|
| Home page | Restoration | Running | Other Cars | Links |
|
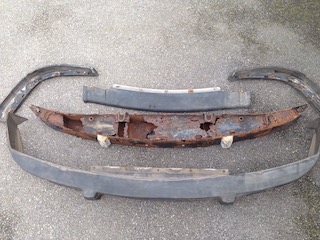
Rollover image for larger picture Once I got the car moved up to Scotland, the first job I did was to remove the bumpers. I think this was Autumn 2014 by then. |
|
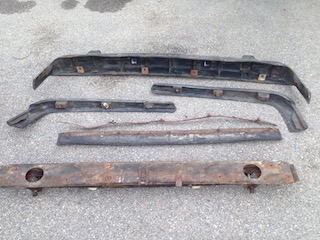
I was in for a bit of a surprise as the rubber bumpers hid a horror of corrosion. |
|
The rear one had stood the test of time a little better. |
I was lucky to get hold of some good second hand bumpers from Hyper Engineering in Oxfordshire, who I have known for a long time. Once conveyed home, I sent them off for Powder coating and they are now set ready for some day in the distant future when they may be fixed to the car. Whilst preparing these, I cut extra holes into the front bumper to allow powder coating and rust proofing inside in the belief that if they rust from the inside, then there will be an added layer of protection.
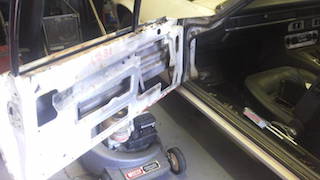
The next jobs I did were to remove the windscreen surrounds and to take a look at the dented passenger door and then to remove the petrol tank. |
|
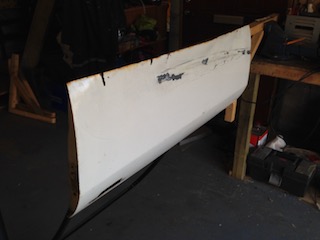
The passenger door is still awaiting work as In intend to fit a new door skin, but the first door skin I got hold of was totally useless - dented and the metal far too thin. That went back and the door awaits further attention. I still need to find a decent door skin, though I've not looked for a while. |
|
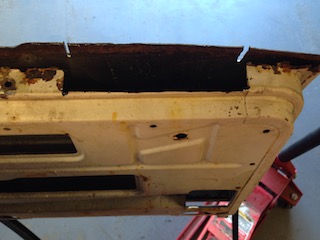
Here it is held in a vice upside down ready to weld a new section into the bottom of the door. |
| ....and another view |
|
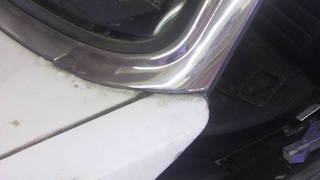
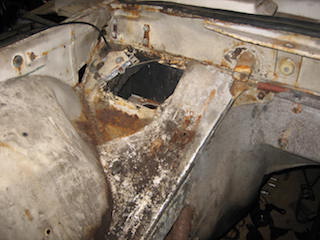
The windscreen surround was hiding some surprises, though the corrosion near the surround did hint at hidden troubles. |

| Here is what was underneath on the pasenger side |
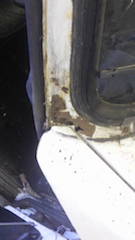
| ....and on the driver's side |
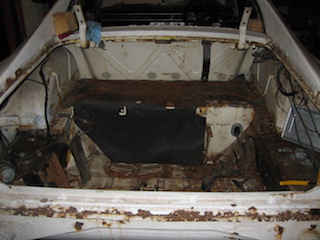
| Here's a photo of the boot showing the rusted out battery carrier |
| and one with the fuel tank removed. The fuel tank seems to be in good enough condition to reuse. |
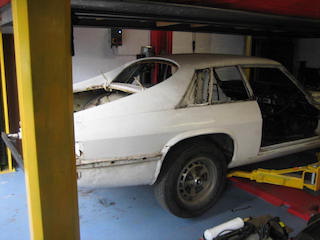
Once the petrol tank was removed and the rest of the glass, I removed the front and rear suspension. |
|
I decided to make life easy for myself and use a 2 post lift to lift the body off the suspension |
|
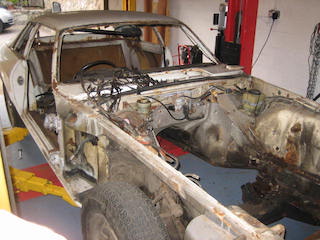
The car is fairly well stripped at this point, but a few things remain attached to the body. |
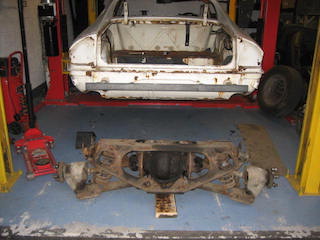
| Here's the IRS removed |
|
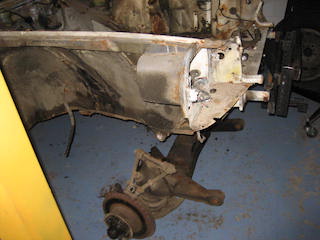
....and the front sub assembly |
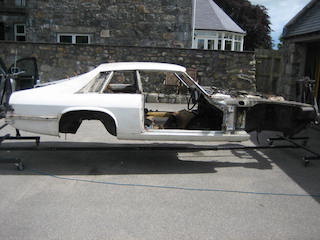
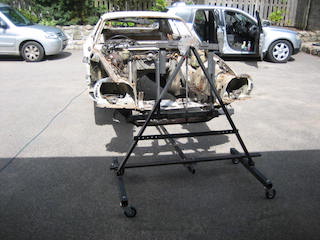
The next step was to fit the body to a roll-over jig and then move it from one part of the garage to another. |
|
This reminds me of the summer of 2016 when we had some sunshine! | |
|
....and a front view. |
The next task, some months later, after the car had sat on axle stands for a long time, was to adapt the roll-over jig to take the car by supporting it at the suspension mounting points.. |
|
This then allowed me to be able to roll the car around and supported it at its strongest points! | |
By the time I finally got back to working on the car it was November 2017. I then set about removing the remaining parts in the engine bay and the dash and heater/aircon systems |
|
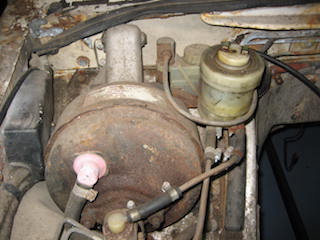
First I removed the pedal assembly and brake servo | |
|
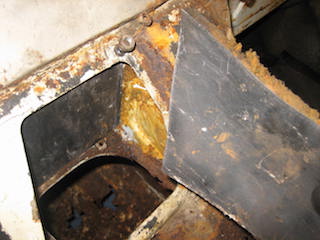
That cleared a space, but on removing the heat shield. | |
|
This was revealed. I assume spilt brake fluid over the years had soaked into the foam back of the heat shield and disolved the paint and lead to this bit rusting | |
|
The heat shield around the transmission tunnel was removed. | |
|
This only revealed light corrosion. |
Other areas I encountered unexpected severly rusted areas include the following: |
|
the rear parcel shelf | |
|
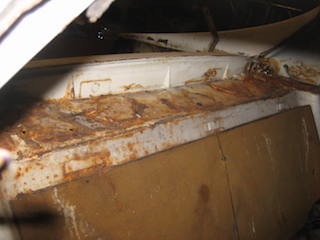
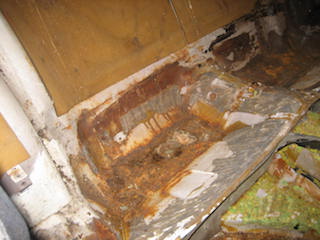
the rear seat well. Presumably water had entered through the rear screen and ended up in the seat well. This only became apparent after the sound deadening materail was removed. | |
|
This wasn't quite so bad, but a nice touch from Jaguar: sponges squeeed into holes to reduce noise, but absorbing water and causing corrosion | |
|
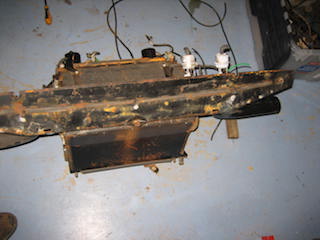
Here is the heater and demister assembly, a bit rusty due to water ingress in the front screen area. | |
|
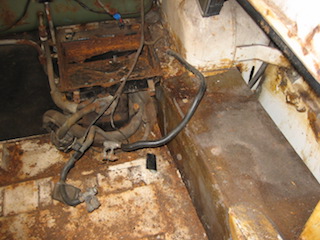
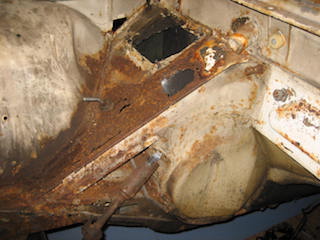
Here's the pedal box area showing corrosion on the cabin side. |
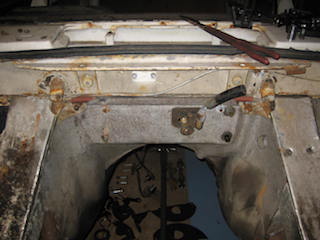
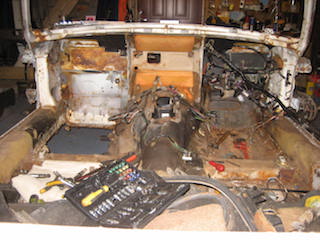
Removing the dashboard and all the heater/aircon equipment behind it proved quite tricky |
|
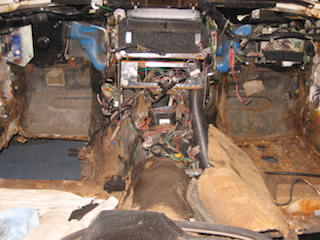
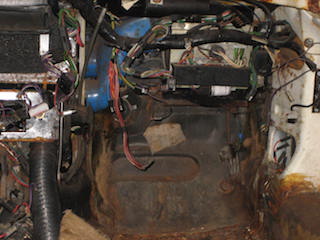
Here is that area after the dashboard was removed |
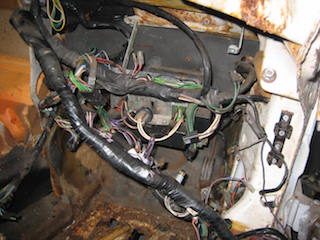
|
and the driver's side, showing the fuse box which is part of the wiring loom. |
|
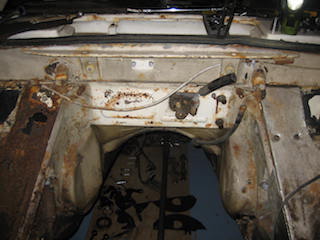
a close up on the passenger side |
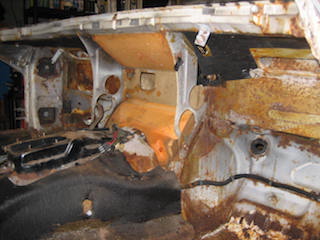
|
and with the heater and demister assembly removed. |
|
still lots left on the driver's side |
|
and finally |
|
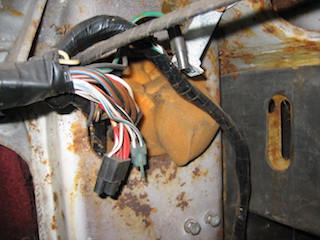
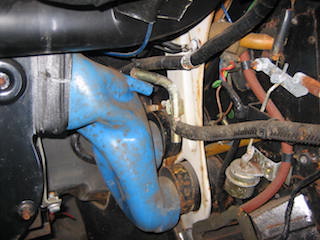
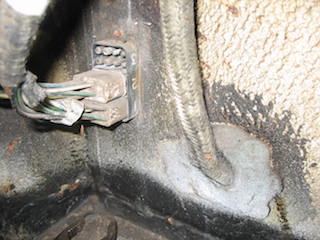
Most of the wirning looms came out OK and tended to run bulkhead plug to bulkhead plug. The one that runs from the engine management box in the boot to the engine bay is a complete loom and runs through grommets as seen here. (next to the driver's side bulkhead plugs) |
PHU41R |
 |
1976 'factory manual' Jaguar XJ-S |